
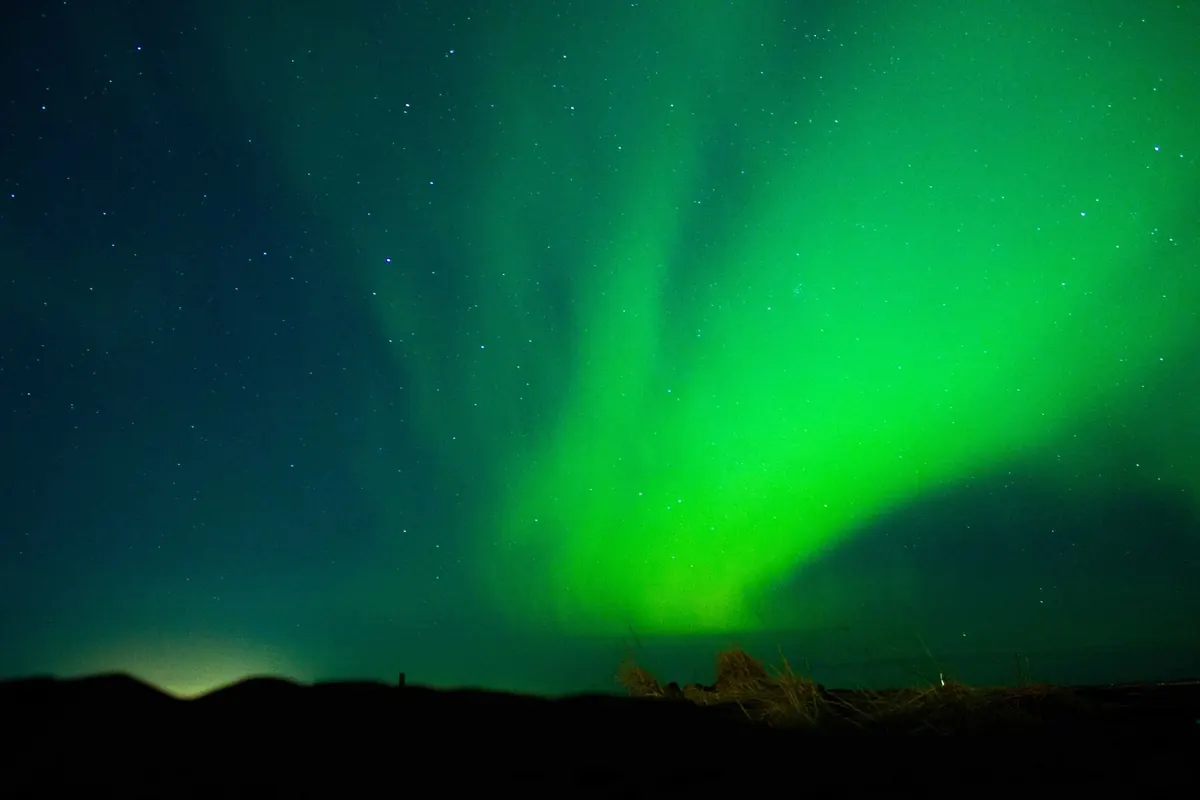
Tromsø sits at 69 degrees north, directly beneath the auroral oval, which means the northern lights here are less a stroke of luck and more a question of patience and clear sky. You do not need professional equipment to bring home something worth framing. A compact with a manual mode, an entry-level DSLR with its kit lens, or a recent phone will all do the job — as long as you get to grips with three things: light, stability and timing.
What to Pack for a Cold Night Out
Most first attempts fail for boring reasons rather than photographic ones. Sort the practical kit first.
- A sturdy tripod. Flimsy travel tripods wobble in the wind that funnels down the fjords. Something solid beats something light.
- At least two spare batteries. Cold drains them fast. Keep the spares in an inside jacket pocket, close to your body, and swap them back and forth as they warm up.
- A head torch with a red light setting. Red preserves your night vision and, more importantly, stops you ruining other people's exposures.
- Gloves you can actually operate a camera in. Thin liner gloves under thicker mittens works better than one pair of ski gloves.
- A microfibre cloth and a plastic bag. The cloth is for frost on the front element; the bag is for the journey home.
- More layers than you think you need. You will be standing still for two or three hours at a time in temperatures well below freezing.
Why the Tripod Matters More Than the Camera
Aurora exposures run from a couple of seconds to half a minute. Nothing handheld survives that, no matter how steady your hands are. Set the tripod up with the legs splayed and the centre column down — raising the column turns a rigid support into a lever that catches every gust. If there is snow or gravel around, push the feet in and pack a little snow around them.
Then remove every source of shake you can. Switch off image stabilisation, because it hunts for movement that is not there. Use the two-second self-timer or a remote release rather than pressing the shutter with your finger. If your camera has a mirror, use the mirror-lock or exposure-delay setting. Small habits, but they are the difference between a sharp star field and a smear.
One more thing: when you come back inside, put the camera straight into that plastic bag and let it warm up slowly. Otherwise the warmth of the hotel room will fog the lens and the sensor with condensation, and it can take an hour to clear.
Camera Settings That Actually Work
Every night is different, so treat these as starting points and adjust from there. The aurora brightens, fades and changes shape minute by minute.
On a DSLR or mirrorless camera
Switch to manual mode. Open the aperture as wide as it goes — f/2.8 on a prime, f/3.5 at the wide end of a kit lens. Set ISO between 1600 and 3200 to begin with. Start your shutter speed at around 8 to 10 seconds. Faster, brighter and more active displays suit shorter exposures of 2 to 5 seconds, which keeps the fine structure crisp. A slow, quiet arc can take 15 to 25 seconds. Shoot RAW so you can adjust white balance later; around 3500 to 4000K gives a natural colour, or leave it on daylight and correct in editing.
On a compact or a phone
Look for a manual or "starry sky" mode and set it to the widest aperture and the longest shutter it allows — many compacts cap out at 15 or 30 seconds. Keep ISO lower than you would on a DSLR, maybe 800 to 1600, because small sensors get noisy quickly. Phone night modes are genuinely capable now: brace the phone against something solid, or use a small tripod mount, and let the long-exposure mode run. Some third-party camera apps allow manual control that your built-in app hides.
Focusing in the Dark
Autofocus will fail. Switch to manual and use live view, then magnify the screen on the brightest star you can find and turn the focus ring until the point of light is as small as it will go. If there is a distant streetlight or lit building on the horizon, that works too. Once it is sharp, tape the focus ring down with a strip of gaffer tape so it cannot drift. Check focus again after an hour — cold contracts metal and lenses can shift.
Reading the Aurora Forecast Without Overthinking It
Two numbers matter, and only one of them is the famous one. The Kp index estimates how disturbed the Earth's magnetic field is. Tromsø is far enough north that even modest activity can put a curtain overhead, so do not stay in because the forecast says Kp 2. The number that decides your night is cloud cover. Check a local cloud forecast — the Norwegian meteorological service and several weather apps show cloud at different altitudes — and be willing to drive.
Look at the sky rather than your screen. A pale grey arc low on the northern horizon often looks like nothing to the naked eye but appears green in a test frame. If the camera sees it, it is there. Give your eyes twenty minutes to adapt away from streetlights, and remember that displays often build through the evening and can flare up and fade within minutes.
Where to Point It in Tromsø
The city lights are a nuisance but not fatal. Telegrafbukta, at the southern tip of the island, is a short walk from the centre and gives you open sea and dark water for reflections. Prestvannet lake is convenient for a quick attempt between clouds. For something more dramatic, cross to Kvaløya and work the fjord viewpoints around Ersfjordbotn, or push further out towards Grøtfjord and Sommarøy, where the mountains give you the foreground that makes an aurora photo feel like a place rather than a pattern. A guided minibus tour is a sound investment for a first visit: the driver knows which valley has a hole in the cloud, and a guide can check your settings in the field.
A Simple Plan for Your First Clear Night
- Check the cloud forecast in the afternoon and pick a direction to travel.
- Arrive before dark, so you can compose and focus while you can still see.
- Include something in the frame — a mountain silhouette, a jetty, birch trees — and keep the horizon level.
- Take a test shot at ISO 3200, f/3.5 and 10 seconds. If it is too dark, lengthen the exposure; if the stars trail, shorten it.
- Wait. Then wait some more. Bring a flask.
- Review your shots in the morning, not on the back of the camera at midnight, when the screen lies about brightness and colour.
Expect your first night to produce one or two keepers, and expect the best display to arrive just as you have decided to give up and go home. That is how it usually works. The photographs that people admire most are rarely the technically perfect ones — they are the ones taken by somebody who stayed out long enough.
Photo: Natã Romualdo / Pexels
Related posts
More stories you’ll love reading